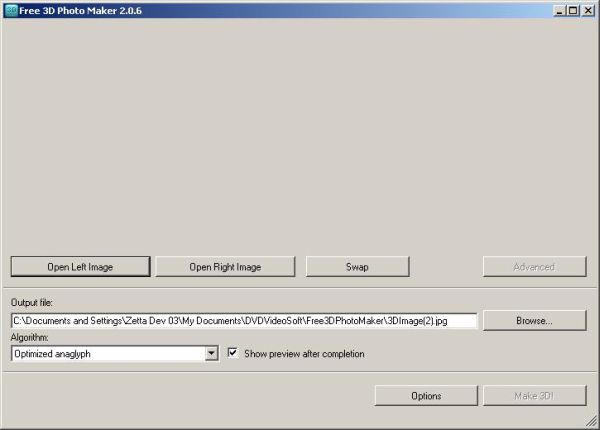
Free 3D Photo Maker free tool lets you create 3 dimensional images from two still images. The program is a part of the Free Studio Manager package from dvdvideosoft.com.
For creating 3D image, you have to capture two different pictures of a still object, captured with a small horizontal shift. To get the right scene, the tool recommends a distance gap of about 2-3 inches in horizontal shift for the second picture. Then you have to give the two pictures as input to the software, which then will create a 3D image. However, to view the 3D image, you will require stereo anaglyph glasses.
Free 3D Photo Maker is compatible with Windows XP, Vista and Windows 7.

[advt]
Step by step procedure for creating 3D images
Step 1. Download and Install Free 3D Photo Maker
Step 2. Launch Free 3D Photo Maker
Follow Start > All Programs > DVDVideoSoft > Programs > Free 3D Photo Maker or just click the Free 3D Photo Maker icon on the desktop.
Step 3. Select Input Video Files
Click “Open left image” button and then “Open right image” button” to select input files.
Step 4. Select Output Location
Click the Browse… button and choose the location where you would like to save your converted 3D images. Click Save.
Step 5. Select Algorithm
In the list of Algorithms select one to create anaglyph 3D image. The following algorithms are available:
Color (red-cyan) anaglyph – regular red-blue anaglyph
True (dark) anaglyph – output image is darker than the original
Gray anaglyph – the output image is gray-painted. In this case the brightness is more even, however, no color reproduction is shown.
Optimized anaglyph – color balance in output image is preserved (in contrast to gray and true anaglyph). Complex calculations bring a better color reproduction (in contrast to color anaglyph).
ColorCode (yellow-blue) anaglyph – it is intended for yellow-blue anaglyph glasses.
Step 6. Make 3D
Click the Make 3D! button and wait until the 3D image is converted.
You can view the output 3D image with stereo anaglyph glasses


Be the first to comment