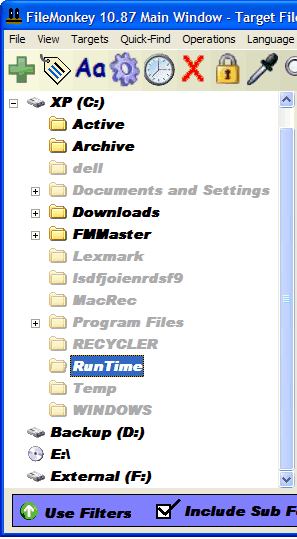
FileMonkey can copy, move, split, search, replace, rename, alter case, list or delete duplicate files, trim, truncate, crop, chop, set attributes, encypt, decrypt, wipe, delete, extract and more. It support all file operations. In the main window, display the files that you wish to work on. To target all files in the displayed folder, select the “Targets / Target all files” menu item from the top of the main window. To change the folder, left-click down the folder tree on the left of the main window.
If you want to work on files in sub-folders, you will be given the option later. When you have targeted your files, launch a feature using the “Quick-Find” menu item at the top center of the main window. A menu will appear. Select the operation that you wish to perform from the menu.
Append To File Contents
To open this feature, select the “Quick-Find, Append” menu item from the main window. The Append feature can append data (text) to the start or end of file contents. Type the text that you wish to append in the append box. Choose if you want to append to the start or end of files. Click “Start” to begin the operation.
Changing Case
To open this feature, select the “Quick-Find, Case” menu item from the main window. From here you can choose to change the case (capitalization) of file names or folder names in the current folder and/or all sub folders to match the case pattern of your choice from the choices provided. For example, you can change case of files between capital letters and lower case.
Copy or Move Files
To open this feature, select the “Quick-Find, Copy” menu item from the main window. From here you can either select to copy files or move files to a new location. You can optionally, copy or move files in sub-folders and re-create the original folder structure.
Encryption
To open this feature, select the “Quick-Find, Encrypt” menu item from the main window. Encrypting your files will make them unreadable until they are decrypted. This is useful if you don’t want anyone else to view data on your computer. Only those who know the encryption password that you use will be able to decrypt the files.
Note that the encryption feature is NOT protected by FileMonkey’s recycle bin protection so it is important that you do not forget the password that you use. To encrypt all target files, enter a password (key) and click the start button. To decrypt these files, target them if they are not targeted (in the main window), enter the key you used to encrypt them and then click the start button again to decrypt them.
The FileMonkey Encryptor meets the 128 bit standard.
Key Text Box: Use this box to enter a memorable key to encrypt or decrypt your files with. You must remember this key as you will need it to decrypt your encrypted files. (Note that this field is not saved on exit for security purposes). The key can be up to 255 characters long.
Start Button: Click this button to encrypt or decrypt files.
Close Button: Click this button to close the encrypt window and return to the main window.
Listing File Names
To open this feature, select the “Quick-Find, List” menu item from the main window. This facility will enable you to create and save a list of all target file names or folder names to a plain text file. From the “List” window, select your options and click on “Start” to generate the list.
Select “DOS Format” to list all files and folders in DOS format (for example: in DOS format, c:\my documents\mylargefile.txt is listed as c:\mydocu~1\mylarg~1.txt). Select “Full Path” to list all files and folders with their full path (for example: instead of listing “myfile.txt”, select this option to list “c:\myfile.txt”).
[advt]You can choose to list all targets, read-only targets or targets with a positive archive flag. For example, when working on files, select the “Read Only Targets” option to list read-only files and ignore all others.
Select “Tab Delimited List” to convert your file list into a tab delimited list. This is useful if you want to import your files list into a spreadsheet program such as Microsoft Excel.
Renaming Files
To open this feature, select the “Quick-Find, Rename” menu item from the main window. Note that you can also use the “Replace” feature to search and replace on file names and the “Case” feature to change the capitalization of file names.
Split Files
To open this feature, select the “Quick-Find, Split” menu item from the main window. Enter split size in the split size text box to define the size of split segments that you require. The options available from the drop down menu will enable you to select the unit of measurement. For example: enter 500 and select KB to define an individual segment size of 500KB. Check the “Delete Original” check box if you wish to delete the original file after it has been successfully split.
Check the “Create Auto Re-Joiner” check box to create a bat file for each file that is split. Double clicking on this bat file will automatically join the split segments when you are ready to join them again. For example, this would be useful if you wanted to join files on another computer without installing FileMonkey.
Join Files
To open this feature, select the “Quick-Find, Join” menu item from the main window.
Check the “Delete Split Segments” check box to delete the segments after a successful join. If this is not checked then the segments will not be deleted. Check the “Write Over Original” check box if you wish to write over the original file. Select the “Join Files That Have Been Split Using FileMonkey” option to join files that have been split using FileMonkey.
Select the “Join Files That Have Been Split Using Third Party Software” option to join files that have been split using third party software. This join operation may not be successful in all cases because different software packages split files in different ways and so we cannot guarantee success using this method. In general, if the files are split with a sequential extension (1, 2, 3 …) and they have not had any data added to them by the third party software then this method will work ok. To be on the safe side, we recommend that you test the joined file after the operation completes to make sure that it runs or loads correctly.
Select the “Merge Files In To One File” option to merge all main window target files into 1 big file. If you are including sub-folders then there will be 1 new file created in each sub-folder.
Click the “Start” button to start the operation that you have selected.
Click the “Close” button to close the window and return to the main window.

Be the first to comment